
THE FOLLOWING IS FROM DR.KARIN'S COMBAT FOOT PAIN. Specifically, Chapter 19. Here we explain how to strengthen the muscles of the lower extremities to help support the foot, ankle, knee, hips and stretch the muscles and joints of the lower legs and feet to help alleviate foot pain, ankle pain, knee pain and hip pain. To stabilize a region, strengthen the muscles in front, behind, and on both sides of the joint needing stability. Strengthening all four quadrants will improve stability because the muscles will hold the joint in place when it experiences unstabilizing forces from any direction. |
This chapter includes exercises for the muscles in front, behind, inside, outside, above, and below the hip, knee and ankle. Strengthening these muscles will stabilize the ankle and foot, making them less vulnerable to injury.
Heel Lifts And Toe Lifts
Heel and toe lifts strengthen the lower leg muscles. Heel lifts strengthen the calf muscles in the back, and toe lifts strengthen the muscles in the front of the lower leg.
While standing, rise up on your toes and lower back down. Then lift your toes up, balancing on your heels, and lower them back down. Keep repeating this rocking motion several times (Figure 19-1). This will also act as a pump to aid lymph flow out of the lower extremities.
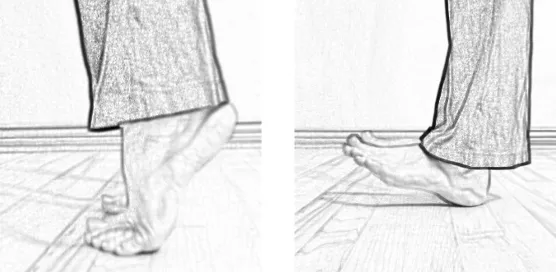
Figure 19‑1: Heel and Toe Lifts
Strengthening The Muscles In Your Feet With Toe Curls
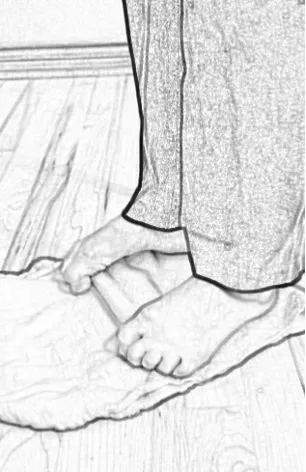
Figure 19‑2: Toe Curls
Toe curls can be done seated or standing, and even while you are wearing shoes.
If you have on shoes, curl your toes to squeeze the material of your socks between your toes.
If you’re barefoot, use a towel as shown in Figure 19-2. This exercises the plantar muscles of the feet. Repeat several times. This strengthens the foot muscles and helps pump the excess fluids out of your lower extremities as well.
Strengthening Lower Leg Muscles With An Exercise Band
EVERSION FOR LATERAL (OUTER) LOWER LEG STRENGTHENING
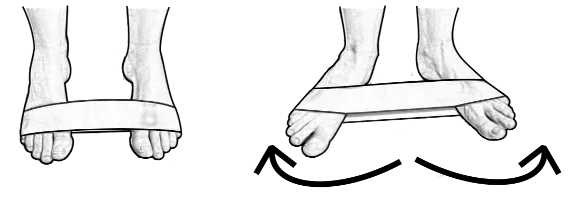
Figure 19‑3: Neutral to Eversion
To strengthen the lateral lower leg muscles (the peroneus muscles), sit down in a chair and put the rubber band around your forefeet (Figure 19-3). Keeping your heels in place, press your feet outward (an action called eversion).
This strengthens the peroneus muscles, which support the lateral arch of the foot.
INVERSION FOR MEDIAL (INNER) LOWER LEG STRENGTHENING
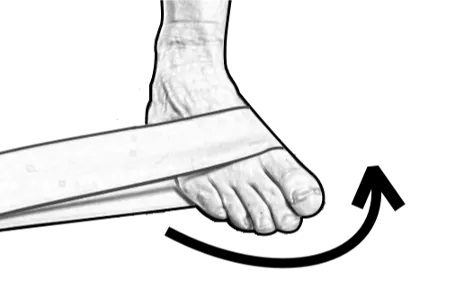
Figure 19‑4: Inversion Exercise
To strengthen the medial lower leg muscles (the tibialis muscles), put the rubber band around your forefoot (Figure 19-4), and tether the other end of the rubber band to a heavy chair or table. Keeping your heel in place, press your foot inward (an action called inversion). Perform this exercise in a seated or prone (on your back) position for ease of stability.
This strengthens the tibialis muscles, which support the longitudinal arch of the foot.
STRENGTHENING THE LOWER EXTREMITIES ABOVE THE KNEES HELPS FOOT PAIN TOO
If you have foot pain, further support of the muscles of the thigh is usually needed. If thigh muscles are weak, the lower leg muscles have to compensate, which can be a strain on the feet. The exercises in this section are offered with this in mind.
Quad (Top Of Thigh) Strengthening
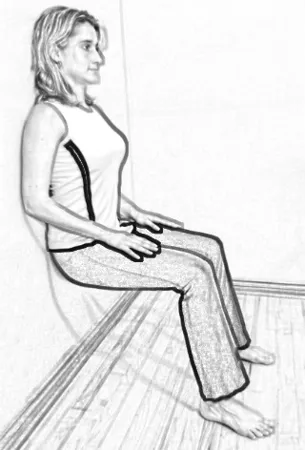
Figure 19‑5
To exercise your quadriceps muscles, the muscles in the front of your upper thigh, stand with your back against a wall, walk your feet out farther than the length of your thighs, and squat by sliding your back down the wall (Figure 19-5). Protect your knees by not squatting too deeply; do not allow your knees to go past your feet. Hold this position for five breaths.
This is a great way to strengthen the quads because your back is supported by the wall. It is also a good exercise to repeat throughout the day for leg strengthening, making for a quick calorie burn.
Stronger Quad (Thigh) Strengthening
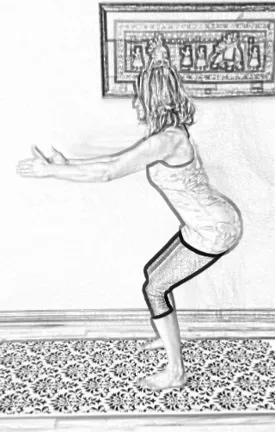
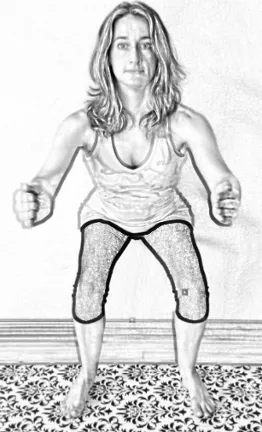
Figure 19‑6: Freestanding squats.
After you are able to do wall squats comfortably, try doing freestanding squats.
Stand with your feet shoulder width apart. Then extend your arms in front of you and move your buttocks back as if you’re going to sit in a chair (Figure 19-6). Make sure your knees don’t move forward in front of your feet because this can strain the knees.
Work toward repeating a dozen times, and then repeat this several times throughout the day. You can do this exercise anywhere, and it doesn’t take long to do. Again, the frequency—not the intensity or duration—is what’s important to build strength and combat the effects of sitting too much.
After you’ve mastered freestanding squats, try going even lower with your squats (Figure 19-7).
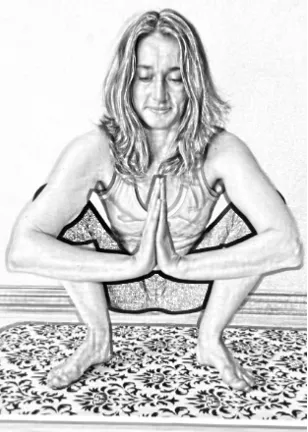
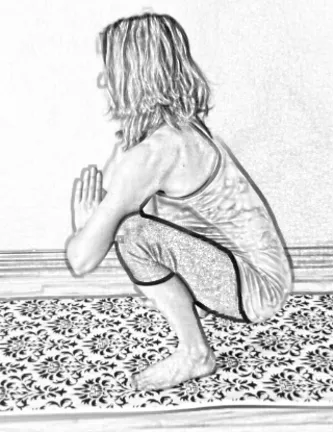
Figure 19‑7: Deep squats.
You don't have to be in pain. Why wait?

to schedule with us.
For an even more intense quad workout, add a weight to your thighs while doing a wall squat (Figure 19-8).
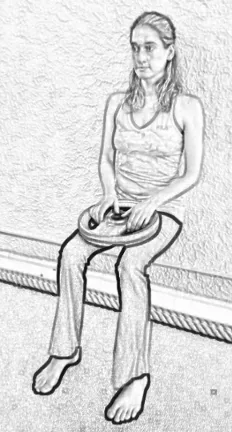
Figure 19‑8: Adding a weight to wall squats.
The added weight places even more strain on your knees, so make sure you keep your knees behind your toes and over your heels.
Adductor (Inside Thigh) Strengthening
To work the inside thigh muscles, place a ball between your knees while you are doing a wall squat (Figure 19-9). Squeezing your knees against the ball will strengthen the adductor muscles.

Figure 19‑9: Squeeze a ball between your knees to strengthen your thigh muscles.
An alternative is to lie on your left side, bend your right knee, and place your right foot behind your left leg (Figure 19-10).
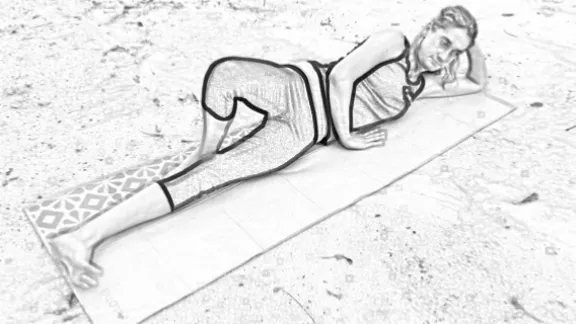
Figure 19‑10: The starting position for adductor muscle strengthening.
Support your head with your left hand. Stabilize yourself by placing your right hand on the ground. Keep your pelvis perpendicular to the ground and protect your low back by keeping your spine in line. Don’t allow your right hip to roll back or forward. Keep your right foot on the ground behind you. Flex your left foot so your toes lift toward your head.
Now you are in a position to work out your left adductor muscle. To do so, contract your inner left thigh by lifting your left foot away from the ground (Figure 19-11). If you feel your front or back thigh muscles engaging, you are not in the correct position.
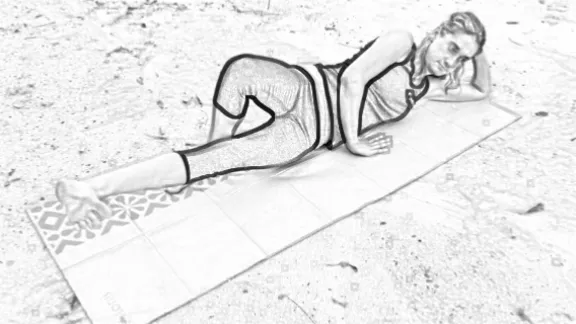
Figure 19‑11: Contracting the left adductor muscle.
Exercise your left thigh by repeating this exercise a few times, and then roll over and exercise your right thigh.
Strengthening the adductor muscles helps stabilize the ankles, knees, hips and pelvis, making your feet and ankles less vulnerable to injury.
TFL (Outside Thigh) Strengthening
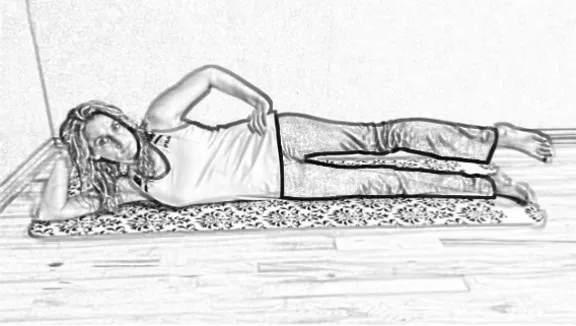
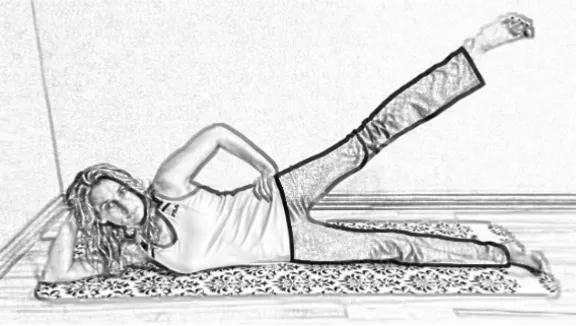
Figure 19‑12: Side leg raises to strengthen the TFL.
To exercise the muscles on the outside of your thighs, lie on your right side. Keep your hips perpendicular to the floor (one hip on top of the other). Raise your left hip. Keep your toes pointed toward your face as you lift your left leg. Pause at your farthest point for a breath or two (Figure 19-12). Then lower your left leg and pause for a breath or two just before it touches the right leg. Repeat three to ten times. Then repeat on the other side.
To increase resistance and make this exercise more difficult, put a mini loop exercise band just above your ankles (Figure 19-13). You can buy a set of mini loop exercise bands online for under $10.
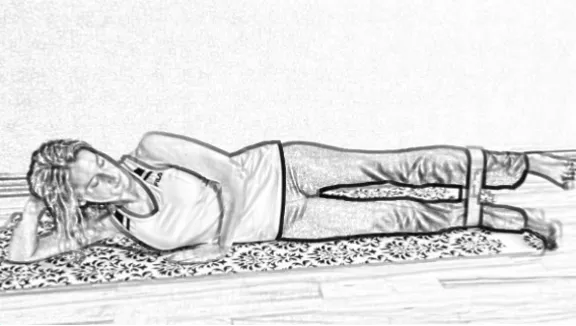
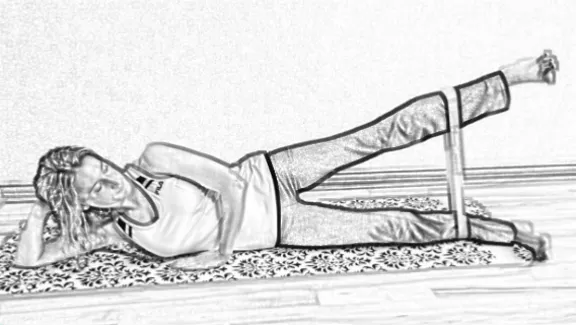
Figure 19‑13: Side leg raise with an exercise band.
Perform the same movements as described in the previous TFL exercise. The band will make it more intense.
You can also work out your TFL muscles using the mini loop exercise band while standing.
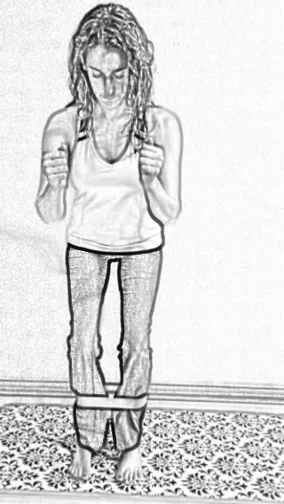
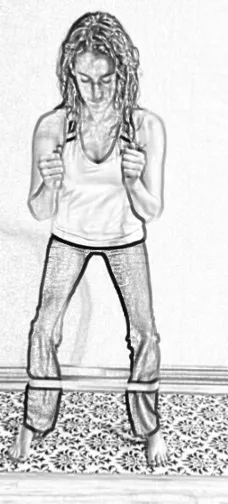
Figure 19‑14: Crab walk with an exercise band.
Place the mini loop exercise band above the ankles. Bend slightly at the waist; hold your arms, bent at the elbows, in front of your body; and keep your knees above the arches of your feet. If you let your knees go in front of your feet, you risk harming your knees.
Move your left leg sideways away from your right leg as far as you can and then plant your left foot on the mat (Figure 19-14). Move your right foot back to your left foot and repeat. You will slowly move to your left. Sometimes this exercise is referred to as the crab walk.
When you have moved as far as you want to go, reverse, and walk sideways back to your start position. Repeat three times.
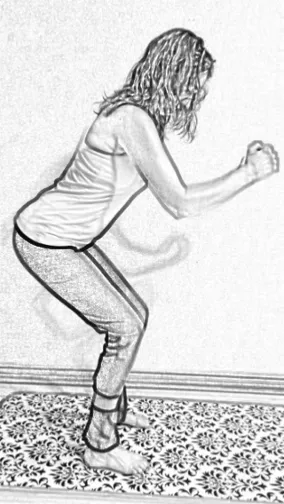
Figure 19‑15: Crab walk from the side view.
Again, note how the knees are over the arches of the feet while doing the crab walk (Figure 9-11). Keep your knees behind your toes because you don’t want to hurt your knees while trying to help your feet.
You don't have to be in pain. Why wait?
to schedule with us.
Combining TFL Strengthening With Core Strengthening
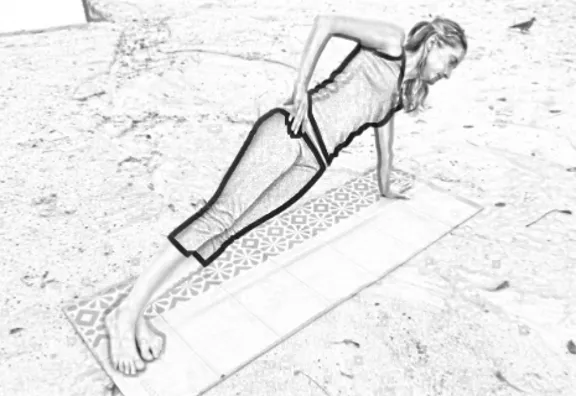
Figure 19‑16: A basic side plank.
A side plank (Figure 19-16) is a great way to strengthen the lateral thigh muscles and your core muscles at the same time.
Get into a side plank by starting in a plank position. Place your left hand under your nose, then turn to the right so the lateral aspect your left foot is on the ground and your right foot rests on top of your left foot. Make sure your left hand is placed under your shoulder, your left wrist is in a comfortable position, and your body alignment is straight (so your pelvic bones are on top of each other, not tilted forward or backward).
If this is too difficult, you can rest your left knee on the ground as in Figure 19-17.
An Easier Side Plank
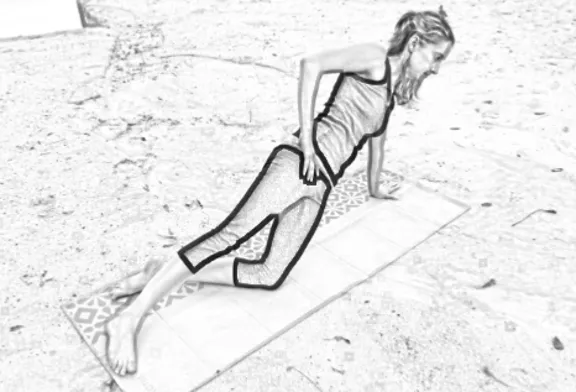
Figure 19‑17: Modified Side Plank.
If placing the weight of your upper body on your arm causes wrist pain, you can hold this position from your left forearm instead of your left wrist. Simply rest the side of your forearm from your elbow to your wrist and the side of your hand on the ground.
A Harder Side Plank
To make this more intense for your TFL, raise your top leg. To really work your core at the same time, raise your top arm (Figure 9-18).

Figure 19‑18: An advanced side plank.
Hamstring (Back Of Thigh) Strengthening
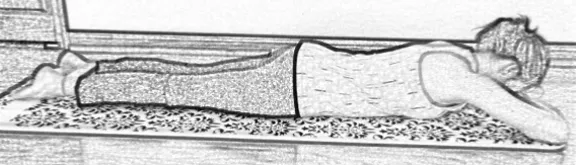
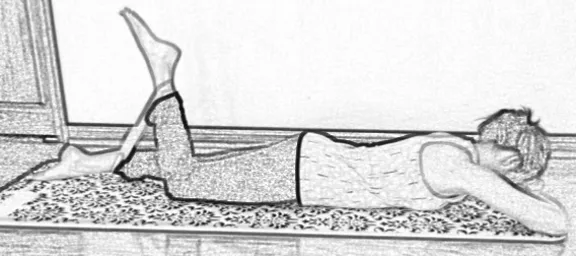
Figure 19‑19: Strengthening the hamstrings with mini loop bands.
To strengthen the muscles in the back of your thighs, put a mini loop exercise band around your ankles and lie on your stomach. Keep your left leg straight and on the ground as you bend your right knee (Figure 19-19). The resistance from the band will strengthen the right hamstring.
Do three to five right knee bends, and then repeat on the other side. Repeat three times as long as you feel no pain in the knee joint. You don’t want to sprain your knee while trying to strengthen your hamstrings.
Deep Calf (Back Of Lower Leg) And Bottom Of Foot Stretch
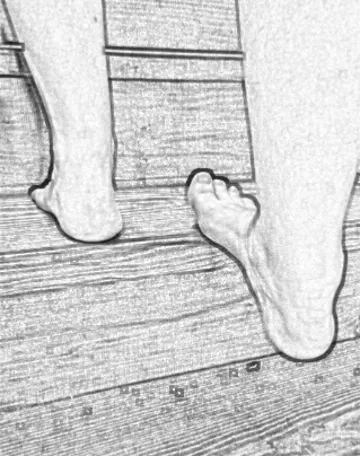
Figure 19‑20: Deep Calf Stretch
Facing a stairway going up, stand on the bottom step and hold on to the rail for balance. Bring your right foot back so your toes are at the edge of the step. Keep your weight on your left foot. Allow your right heel to gently extend toward the floor to stretch your right calf (Figure 19-20). Hold for three breaths. Then repeat on the other side.
This exercise can be done with shoes on, unless you are wearing high heels. If you are wearing high heels, use this stretch as an opportunity to take them off for a minute. Be sure to wiggle your toes before doing this stretch.
Calf Stretches Continued
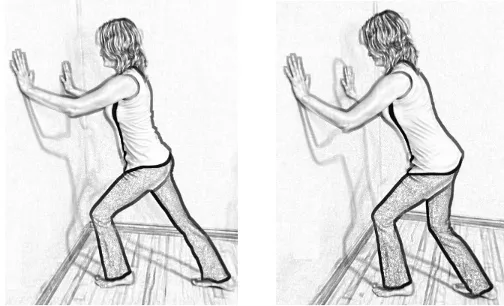
Figure 19‑21
To stretch the calf muscles in the back of your lower leg, stand facing a wall and put your hands against the wall. Bring your right leg back and stretch your right heel toward the floor (this stretches the gastrocnemius muscle at the back of your calf, connected to the Achilles tendon). Hold for three breaths. Then bend your right knee to stretch the soleus muscle (the deeper muscle under the gastrocnemius). Hold for three breaths.
Repeat on the other side.
This not only stretches the muscles of the calf, but of the arches of the feet.
Foot ABCs For Lymphatic Drainage
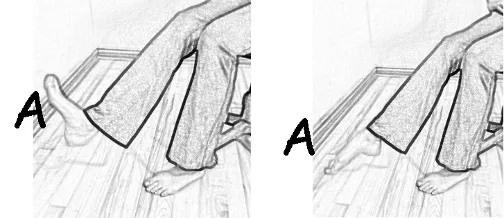
Figure 19‑22
If swelling is the cause of your foot pain, this is a great way to help drain the excess fluid out of your lower extremities throughout the day. Simply use your big toe like it is a pen, and draw the alphabet in capital letters in the air from A to Z.
Repeat this with your other foot.
This will cause the ankle to go through the motions of inversion, eversion, plantar flexion, dorsiflexion, and circumduction without having to remember a complicated routine. The motion will cause the lower leg muscles to contract and relax, pumping excess fluid out of the lower extremities back up toward the torso. Circulating those fluids back into the bloodstream means the kidneys will eventually be able to filter out all of the toxic metabolic waste.
This is a great exercise to do to prevent swelling and/or varicose veins.
Legs Up A Wall For Lymphatic Drainage
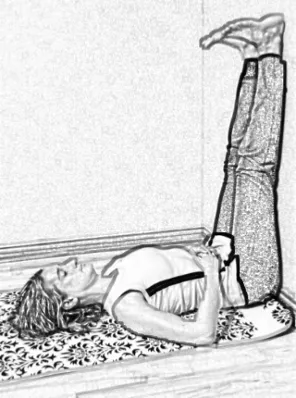
Figure 19‑23: Lymphatic Drainage
Another great way to drain the excess lymph from your feet is to rest your legs against a wall. You can also draw the ABCs with your feet like in the previous seated lymphatic drainage exercise to actively milk the lymph out of the most distal tissues of your feet.
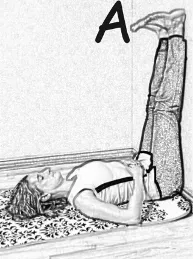
Figure 19‑24
If you have pain, we can develop a specific home program for your specific needs.
You don't have to be in pain. Why wait?
to schedule with us.
Drummond Chiropractic, LLC
Plantar Fasciitis Specialists
565 N Walnut St
Bloomington, IN 47404
(812) 336 - 2423